

Key Takeaways
Why Anatomy Diagrams Feel Confusing at First
Anatomy diagrams are not casual illustrations - they are technical documents governed by centuries of scientific convention. Unlike a photograph, they deliberately simplify, color-code, and orient the body in ways that prioritize clarity over realism. Once you understand the rules they follow, what looks like a chaotic tangle of labels and arrows becomes a precise, readable map.
The same challenge applies to other specialized visual formats. Just as reading a star map requires learning its own orientation logic before the sky makes sense, anatomy diagrams demand fluency in a specific visual language. This guide walks you through that language, step by step.
Before diving in, it helps to have a basic vocabulary ready. If terms like medial or sagittal plane are unfamiliar, the key anatomical terms glossary provides a useful reference to keep open alongside this guide.
What You'll Need Before You Start
Reading anatomy diagrams effectively requires a few simple resources and habits.
What you will need
How to Read an Anatomy Diagram Step by Step
Work through these steps each time you encounter an unfamiliar anatomical illustration.
Identify the Anatomical Position
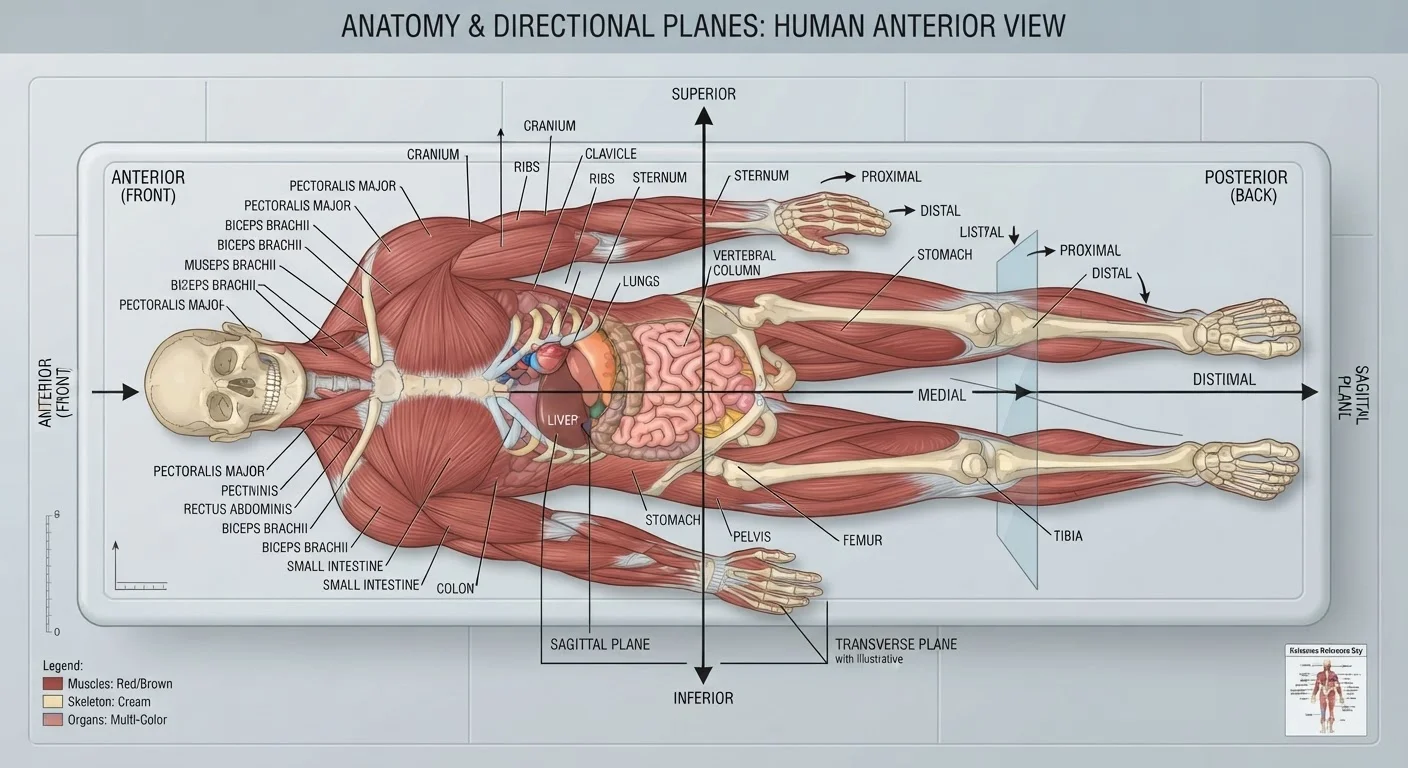
Every standard anatomy diagram assumes the body is in the anatomical position: standing upright, facing forward, arms at the sides with palms facing outward, feet flat and forward. All directional terms - and all spatial relationships between structures - are defined relative to this position, regardless of how the diagram actually shows the body.
If the diagram shows a prone (face-down) or supine (face-up) figure, or a limb in a non-standard angle, note that deviation explicitly before proceeding.
Determine the Plane of View
Anatomy diagrams show the body sliced or viewed along one of three primary planes:
- Sagittal plane: Divides the body into left and right halves. A midsagittal cut runs exactly down the midline.
- Coronal (frontal) plane: Divides the body into front (anterior) and back (posterior) sections.
- Transverse (horizontal) plane: Divides the body into upper (superior) and lower (inferior) sections - this is the plane used in CT and MRI cross-sections.
Most diagrams label their plane of view in a small indicator box or note. If none is present, infer the plane from the perspective shown.
Read the Directional Terms Relative to the Body
Anatomical direction words are relational, not absolute. Key pairs to internalize:
- Anterior / Posterior: Front / Back of the body
- Superior / Inferior: Toward the head / Toward the feet
- Medial / Lateral: Toward the midline / Away from the midline
- Proximal / Distal: Closer to the trunk / Farther from the trunk (used mainly for limbs)
- Superficial / Deep: Closer to the body surface / Farther from it
These terms always refer to the body, never to the page orientation.
Decode the Color Conventions
Standard color coding in anatomical illustrations follows widely accepted conventions:
- Red: Arteries (oxygenated blood, away from the heart)
- Blue: Veins (deoxygenated blood, toward the heart)
- Yellow: Nerves
- White or light gray: Tendons, ligaments, or bone
- Purple or pink: Muscles (varies by publisher)
Always verify against the diagram's own legend - some educational diagrams use alternative schemes, particularly those designed for color-blind accessibility.
Follow Leader Lines to Their Structures
Labels in anatomy diagrams connect to structures via thin lines called leader lines. A leader line should point precisely to the structure it names - not to surrounding tissue. If a line appears to end ambiguously, check whether it terminates with an arrowhead (indicating a surface) or a dot (indicating a deeper point).
Read all labels before interpreting relationships. A label you overlook can completely change your understanding of what a nearby structure is.
Cross-Reference With a Reliable Source
No single diagram captures the full complexity of any anatomical structure. After working through the diagram, verify your interpretation against a second authoritative source - a peer-reviewed textbook, a university anatomy atlas, or a medically reviewed digital reference. Pay particular attention to any structure whose label or position surprised you.
Common Misreadings and How to Avoid Them
Even careful readers make predictable errors when first interpreting anatomical illustrations.
Confusing left and right: In a standard anterior (front-facing) diagram, the figure's right side appears on your left. Many readers instinctively flip this. Always anchor your reading to the figure's perspective, not your own.
Assuming depth from a 2D image: A flat diagram cannot fully convey how structures layer in three dimensions. A structure that appears beside another may actually be deep beneath it. Cross-sectional views - shown in the transverse plane - help resolve this ambiguity.
Misreading color conventions: Red does not always mean danger or importance - in vascular diagrams it specifically indicates oxygenated arterial blood. Context matters. Always check the legend before drawing conclusions from color alone.
These misreadings are surprisingly common even in formal education settings. The article anatomy myths that even smart people believe explores how such misunderstandings persist - and how science corrects them.
Once you feel confident decoding a standard diagram, consider applying these skills to a specific system. The room-by-room tour of cardiac anatomy is an ideal next step, walking through the heart's chambers and vessels using precisely the conventions covered here.
Evaluating the Quality of an Anatomy Source
Not all anatomical diagrams are created equal. Textbook illustrations from peer-reviewed publishers are held to rigorous accuracy standards, while freely available web images may be outdated, mislabeled, or oversimplified. Look for diagrams that cite a primary source, indicate the anatomical plane of view, and include a scale reference or body region indicator.
The guide to evaluating anatomy education sources offers detailed criteria for assessing reliability - particularly important when you're using diagrams to understand a health condition or medical procedure.
This article is for general educational purposes only and is not a substitute for professional medical advice, diagnosis, or treatment. Always consult a qualified healthcare provider for questions about your own anatomy or health.